
Presse universelle MecaMotion par 
Envelope
The envelope allows the shape of the force curve to be controlled in relation to the position.
Adding a new envelope
Envelopes can be created in the project tree structure by right-clicking on the "Envelope" folder and then "Add an envelope". (see figure 1)
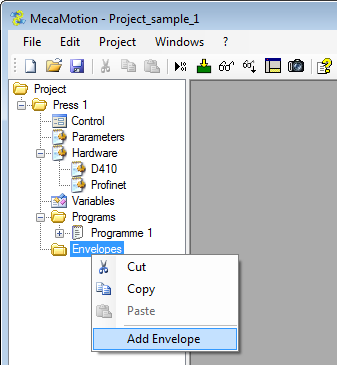
Figure 1: Adding a new envelope
To be able to place the objects of the envelope, it is essential to have one or more force/position curves reference.
To obtain them, you must perform cycles and save the curves.
See the instruction "Curve recording control" for more information on recording curves.
You can view the curves received in the "control" window. To view several curves on the screen, you must select them by clicking and dragging.
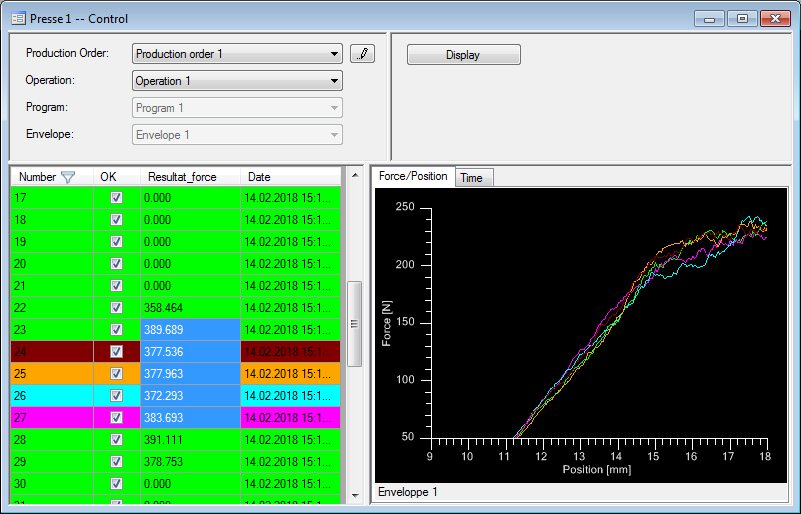
Figure 2: Retrieving reference curves
When you have enough curves to define the envelope, select them from the list on the left, using the "CTRL" or "SHIFT" key. The selected curves will then be displayed in different colors.
You can now right-click on the graph and then "send to envelope". You must then choose the envelope to which you want to send them.
Placing the objects in the envelope
Now open the envelope.
Select the object you want to add. Two types of objects are available:
Quadrilateral (green) / Control point (yellow)

You can place a maximum of 8 quadrilateral objects and 8 other objects. Currently the other objects are force control points and position control points.
Place the object on the graph and dimension it by moving its points, tolerances or manually entering the coordinates of its points. (see Figure 3)
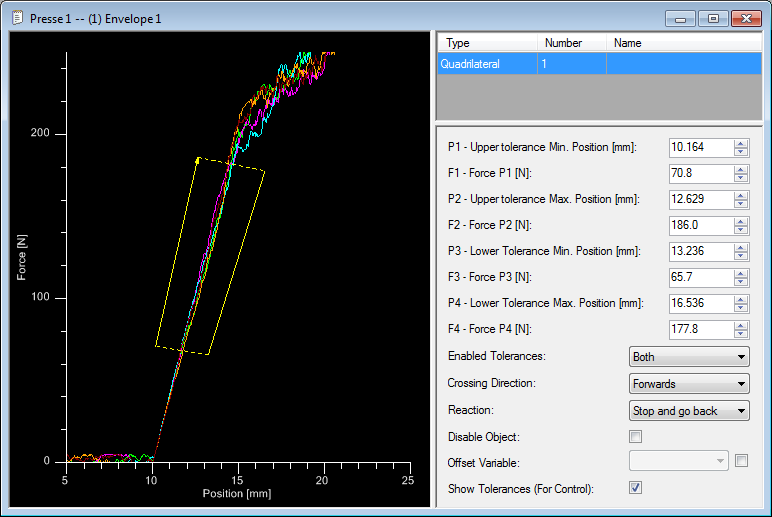
Figure 3: Placing an object in the envelope
Objects parameters
When an object is selected, you can change its settings in the right of the window (see figure 3).
Quadrilateral parameters:
•Enabled tolerances (lower, upper, or both)
•Direction of passage of the curve in the object.
•Reaction when the tolerance is exceeded (stopping the axis, stopping the axis and go back to the release position or continuing the cycle normally)
•Deactivation of the object, if the box is checked, the object will no longer be processed and it will be greyed out on the graph
•Added a position offset that allows to shift the objects of the envelope if the starting position is different
•Display the tolerances for control that allows you to return with the curve, the tolerance points that have been calculated on only one object of the envelope at a time
Recovery of curves and tolerances
To check that the curve is within the tolerance, go back to the "control" window.
Important, to receive the force/position curves, you must create a production order and an operation containing the program and envelope you are working with.
If you have requested the return of tolerances for an object, all calculated tolerance points will be displayed in red.
By right-clicking on the graph, you can show and hide the objects of the envelope.
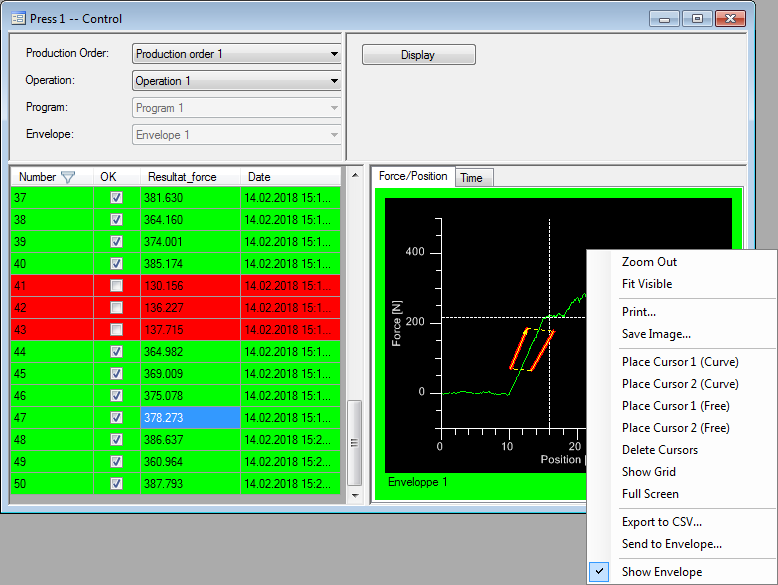
Figure 4: Visualization of the curve, envelope object and return of tolerance points
PROFINET inputs / outputs for the envelope
By PROFINET, the input byte n°241 allows you to indicate the envelope number you wish to activate.
The input bit n°240.6 is used to validate the envelope number to be activated.
If the envelope is valid, the press returns the number of the active envelope in the output byte n°251.
You can enable or disable the envelope control using input bit n°240.7 (at "1" for the control to be active).
When you validate the envelope to be activated, if it is not present in the part-program, error bit n°248.5 changes to "1".
During operation, if the curve exceeds an envelope tolerance, error bit n°248.4 changes to "1".
