
Presse universelle MecaMotion par 
"Curve recording" control instruction
This instruction is used to record the force values and position of the axis during positioning.
For each positioning of a part-program, it is possible to make this recording. Since all the records made in the same part-program are recorded in the same table, each record must be given a different "ID" (Identifier) in order to be able to differentiate them.
Since this "ID" is also recorded in the records, the minimum value that an "ID" can have is equal to 1e+6 (1 million).
It is possible to record the force and the position throughout the positioning, or only on a part of it (Recording mode = in a segment)
For each curve recording you must choose the maximum time that the positioning can last, if you increase the time it increases the sampling time, the minimum being 2[ms]. Be careful, if you use several curve recording instructions in a program, the number of values recorded may exceed the maximum number.

Figure 1: Example of programming a recording in a positioning area
Below is a list of the instruction's input and output parameters:
Parameter name |
Declaration |
Type of data |
Default value |
Description |
|---|---|---|---|---|
ID |
Input |
REAL |
0 |
Curve identifier |
Recording mode |
Input |
Enum [In a segment or entire positioning] |
Entire positioning |
Recording mode, in a segment or entire positioning |
Segment start point [mm] |
Input |
LREAL |
0[mm] |
Start position of the control zone |
Segment end point [mm] |
Input |
LREAL |
0[mm] |
End position of the control zone |
Maximal time [ms] |
Input |
TIME |
1m40s |
Maximum time that the recording can last |
Table 1: List of instruction parameters
To retrieve the curves from MecaMotion, simply go to the project tree structure and open the "control" window (see figure 2).

Figure 2: Project tree structure
In it, you must choose a production order and an operation in which the curves will be stored. Then run a program containing curve records and when it is finished the curves will be displayed in the force/position graph.
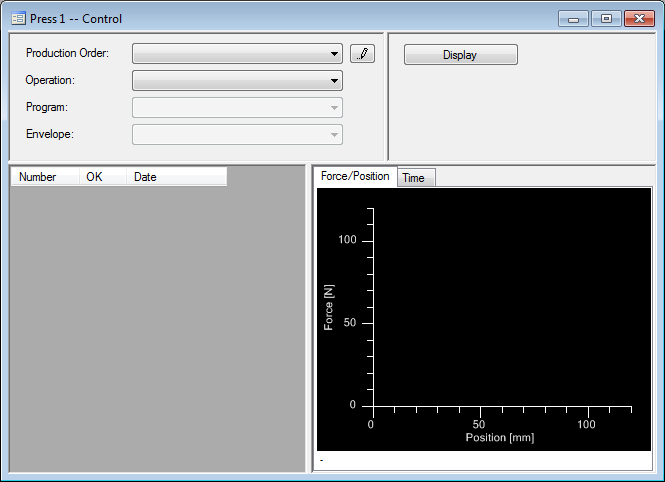
Figure 3: Curve reception window
Example: Below is an example of how to use the curve recording control instruction.  Figure 4: Example of programming the curve recording control The first recording (circled in red) will be made throughout the next positioning with a velocity equal to the value of the "FastVelocity" variable (in LREAL format). The second recording (circled in blue) will be made from position 27.5mm to 36.3mm during the next positioning with a velocity equal to the value of the "Slow Velocity variable (in LREAL format). |
